Using the waitlist on Embodia
You’re fully booked and patients are lining up to book an appointment with you! Congratulations!
You can use the waitlist feature on Embodia to manage your waitlist and notify your patients of a last-minute cancellation based on their availability.
The waitlist feature is available for all Practice Management (Tier 3) users on Embodia.
Overview
Here is a brief overview video of how to use the waitlist feature on Embodia:
Adding a patient to your waitlist
A patient can be added to the waitlist from both the Embodia dashboard and the calendar.
If you are the clinic manager you can add patients to the clinic waitlist. This allows you to add a patient to any practitioner's waitlist. Each individual practitioner can also manage and add to their own waitlist.
Practitioners
If you are a practitioner, navigate to Consults > My schedule > My waitlist:

Click on ‘Add to waitlist’:

Then fill in the form with:
- The patient’s name (note: the patient must have already been added to Embodia);
- The service;
- The dates that they are available;
- The days of the week they are available;
- The time of day they are available;
- Any additional notes or information.
And click ‘Submit’
Clinic Managers
If you are the Clinic Manager, navigate to Consults > Clinic waitlist:

Then click ‘Add to waitlist’:

Fill in the form with:
- The patient’s name (note: the patient must have already been added to Embodia);
- The practitioner this patient would like to see;
- The service;
- The dates that they are available;
- The days of the week they are available;
- The time of day they are available;
- Any additional notes or information.
Then click ‘Submit’
Congrats! You’ve added your first patient to your waitlist!
From the Calendar, click on a time slot with a booked appointment and then click on + Add to waitlist:

Fill out the patient waitlist criteria and click Submit. Your patient is now added to the waitlist!
Searching your waitlist
From the dashboard
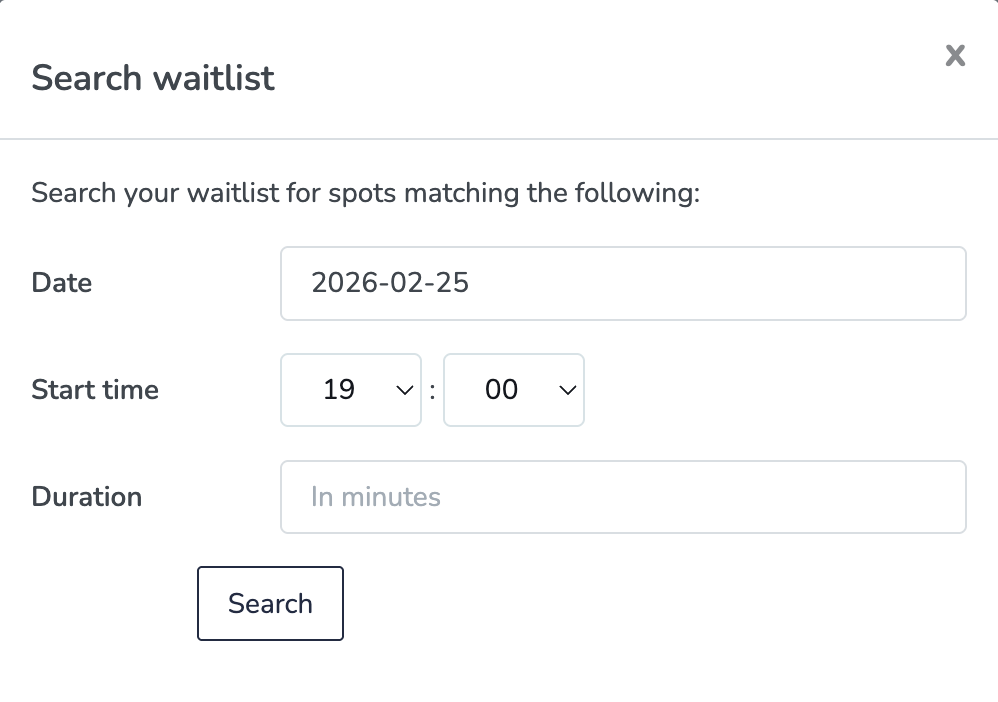
Navigate to Consults > My schedule > My waitlist. Then click on Search waitlist.
To search for patients who are on your waitlist, enter the date, start time, and duration of appointment:
From the calendar
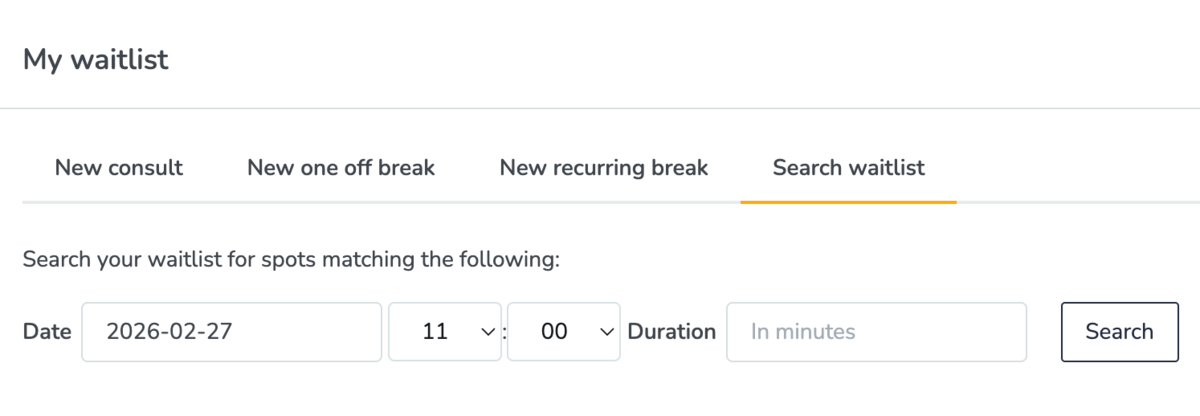
Navigate to your calendar and click on a blank time slot. Then click on ‘Search waitlist’, enter the date, start time, and duration of the appointment, and then click on Search
When a spot becomes available in your schedule and you would like to book a patient from your waitlist, you can either notify the patient of the availability or book the appointment on their behalf.
Notifying patients from your waitlist about an appointment that matches their availability criteria
Notifying specific patients on your waitlist
Find the patient on your waitlist that you would like to book. Then check the box next to their name and click Send email notification.
Optional: You can use this feature to send multiple patient emails at the same time by checking the box next to all the names in the waitlist that you would like to receive the email. The waitlist email sent to the patient(s) will include a link to book an appointment.

Important: To be able to send an email notification to the patient, two criteria must to be met:
- The selected service needs to be available in online booking.
- The patient needs to have an email address on file.
Notifying all patients on your waitlist
If you don't have a specific patient in mind, you have the option to have Embodia try to notify anyone on your waitlist whose criteria fit the newly opened slot's parameters.
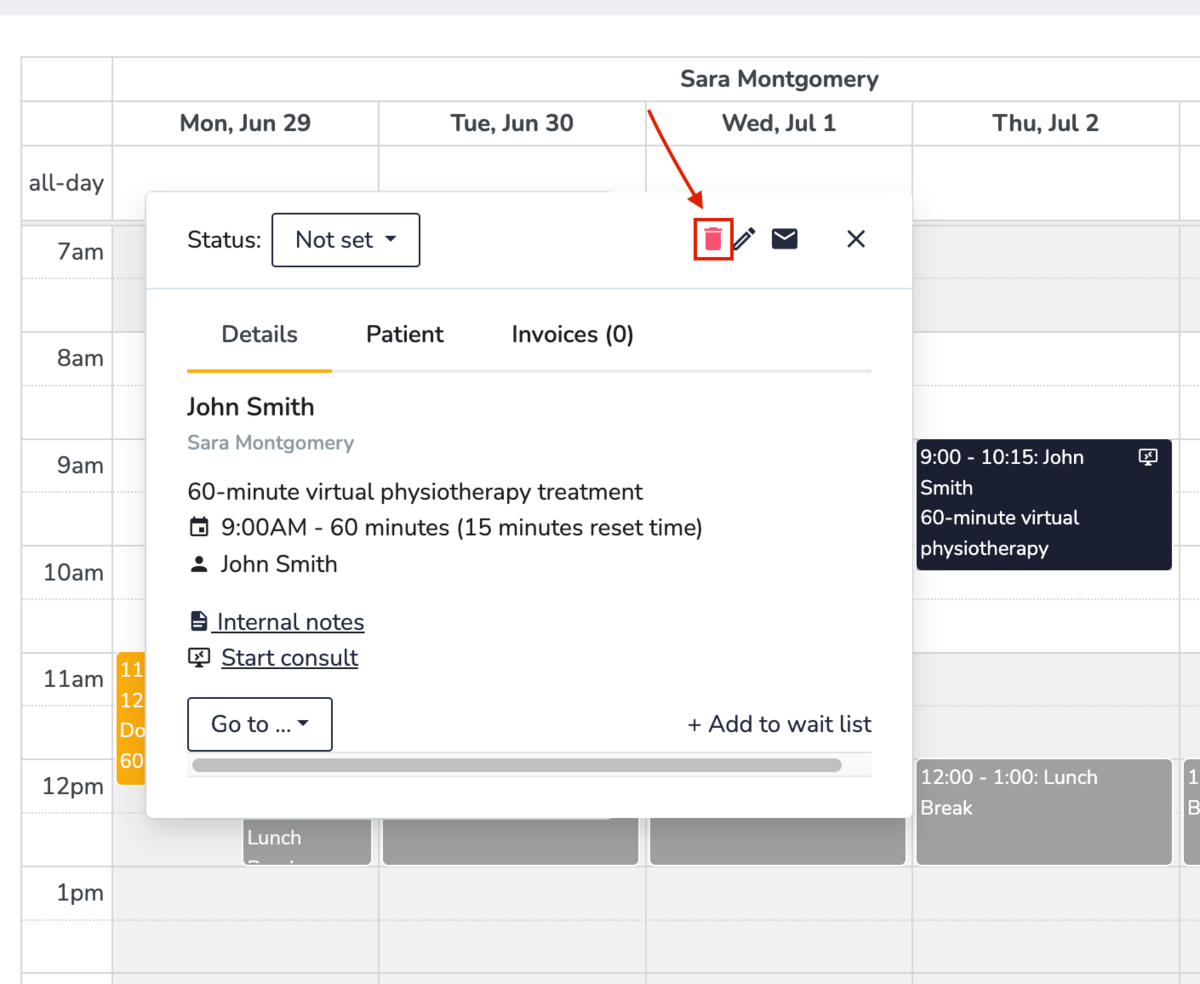
To achieve this, click on the calendar icon in the top right of your screen to get to the Calendar view.
Once in the calendar, select the consult you wish to cancel and click on the garbage can (delete) icon.
To confirm whether you would like to cancel that particular consult, this pop-up confirmation will come up.
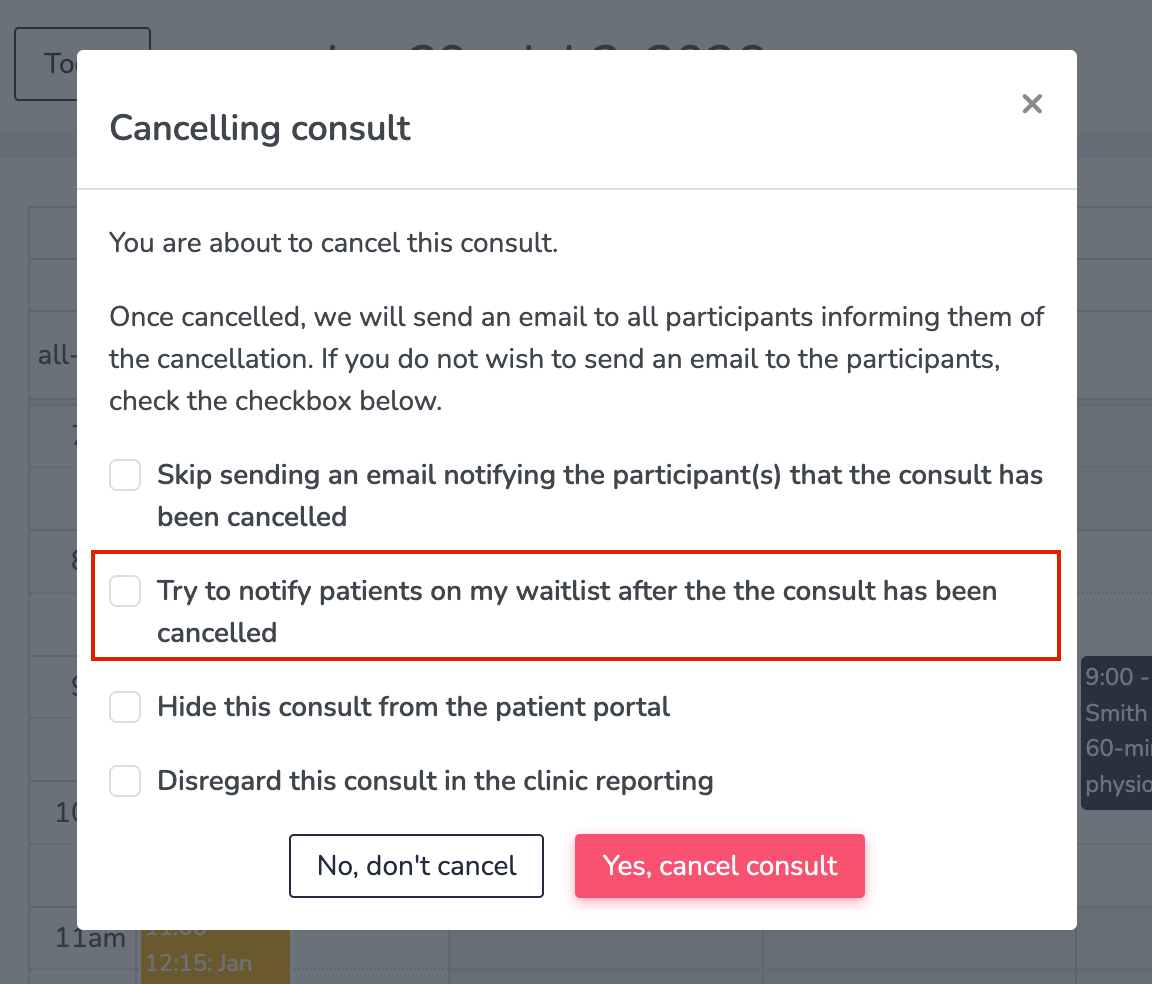
Here, amongst other things, you'll notice the option to Try to notify patients on my waitlist after the the consult has been cancelled. Select this checkbox to notify all (applicable) patients on your waitlist of this new opening on your schedule.
Note: You also have the option for patients on your waitlist to be notified automatically when another patient cancels an appointment via their patient portal (if you have allowed them to cancel via the Consult settings for that service). Patients will only be notified if their criteria match the available slot. You can learn more about enabling this auto-notify option for your waitlist in the Enable the waitlist feature in online booking guide.
To learn more about cancelling consults, you can visit our Cancelling a scheduled consult guide.
To book a patient from your waitlist into your schedule
Find the patient on your waitlist that you would like to book. Then click Book an appointment next to their name:

You will then be prompted to complete the consult information as you normally would.
How to manage the clinic waitlist as the clinic manager
When a spot becomes available in your clinic schedule, you can book a patient appointment on the patient's behalf for any of your clinic's practitioners.
To book a patient from the clinic waitlist into a practitioner's schedule
Navigate to Consults > Clinic waitlist.
To book a patient from the Clinic Waitlist, click on Book appointment:

Then fill out the New consult information for your patient and click Submit to book.
To search the Clinic waitlist
Navigate to Consults > Clinic waitlist > Search waitlist:

To search for patients who are on the Clinic waitlist, enter the date, start time, and duration of appointment:
